Windows Errors? Fix Them Before They Spread
Repair common Windows errors and clear accumulated junk for a smoother, more stable PC - no reinstall needed.Free scan · no reinstallOutdated Drivers Are Slowing You Down
One free scan finds every outdated or missing driver and matches the right update for your exact hardware.Free scan · exact hardware matchA Raspberry Pi, USB audio interface, footswitches and dedicated looper software are the most practical starting point for a standalone DIY guitar looper. A simple Arduino by itself is not a complete looper: audio capture, playback, overdubbing, storage and reliable real-time performance need their own capable audio system. Build a Pi version if learning and customization are part of the goal; choose a commercial pedal if you need dependable live performance without troubleshooting.
What a guitar looper has to do
A looper records a guitar phrase, plays it repeatedly, and mixes new playing over the playback as overdubs. A usable system also needs a suitable instrument input, an audio output, predictable foot controls, and sensible ways to stop, clear or undo material. Poor input matching can thin the guitar tone; unsuitable audio buffers or an overloaded computer can cause delay, clicks or skipped playback.
“DIY looper” can mean several different projects: a complete pedal with audio processing inside; a handmade controller that sends commands to a computer; a Raspberry Pi music workstation; or custom embedded audio hardware. These are not interchangeable. A DIY controller is usually much simpler than building the audio engine itself.
Choose a project level
- Software prototype: Run existing looper software on a computer or Pi with an audio interface. Use a keyboard or temporary buttons to check that the recording and overdubbing workflow suits you.
- Pi prototype: Add GPIO switches and LEDs on a breadboard. Test audio quality, timing, boot behavior and controls before soldering.
- Enclosed pedal: Add instrument-grade jacks, a suitable buffer or instrument input, power filtering, a robust enclosure, strain relief and service access.
- Custom audio hardware: Design around a DSP or embedded audio platform, codec, memory and real-time firmware. This is an advanced route, not the recommended first build.
Recommended baseline: Raspberry Pi, USB audio and foot controls
A documented example from Norm’s Projects uses a Raspberry Pi, USB sound adapter, looper software, GPIO controls and—when connecting a guitar directly—a separate transistor buffer. Its controls include a momentary Play/Record/Stop footswitch, a Run/Edit switch and indicators; the software supports a base loop, overdubs and track deletion and recovery.
#1 Best Overall
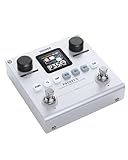
- Multifunctional Guitar Pedal: The PocketX is a comprehensive toolkit for guitarists and bassists, featuring 6 effects modules including noise gate, boost, and compressor, plus 20 preamp, 3-band EQ, 7 modulations, 5 delays, 6 reverbs, and 20 IR CAB slots for unparalleled sound customization.
- Rich Preset Sounds: Comes with 40 factory preset sound effects and supports up to 80 customizable storage options. Users can overwrite and edit presets for a truly personalized sound experience.
- Portable and Extended Play: Compact and pocket-sized, Designed for guitarists on the go. The built-in rechargeable lithium battery offers up to 10 hours of continuous use, perfect for all-day play.
- User-Friendly Design: With simple and intuitive control knobs make it easy for beginners to get started quickly. The clear colour display makes it easy to navigate through effects and settings, enhancing your playing experience.
- Cross-Platform Connectivity: Edit, save, and manage your presets easily using our dedicated Windows/Mac OS/Android/iOS app. PocketX ensures you’re always in control, whether practising at home or performing live. Pocket X integrates various functions, supports wireless music transmission, is compatible with computer sound cards, and features headphone monitoring.
Guitar → input buffer or suitable instrument input → USB audio interface → Raspberry Pi looper software → audio interface output → amp or pedal chain
Footswitches, LEDs and display ↔ Raspberry Pi GPIO
The buffer matters in this particular design because the project author found a direct guitar-to-low-cost-sound-card connection sounded thin. A guitar pickup is not the same as a line-level source. Use the documented buffer, an appropriate instrument input, or a suitable external buffer/DI rather than assuming every USB adapter will preserve the guitar signal. See the project’s design options.
The reference project recommends a Pi 3B+ or Pi 4 for its build and cautions that its original Pi Zero W could stutter when audio competed with file operations. That is project-specific guidance, not proof of compatibility with current Raspberry Pi OS or newer hardware. Test the exact Pi, operating system, audio device and software version you intend to use. PiPedal, for example, documents Pi 4 and Pi 5 support for its own effects platform, but that does not establish that another looper program works on those models.
Parts: separate essentials from the extras
Use the reference parts list as a design-specific example, not a guaranteed shopping cart. Confirm current availability, connector format, Linux compatibility and physical fit before buying.
| Part | Purpose and qualification |
|---|---|
| Raspberry Pi, power supply and SD card | The computer runs the looper. The documented build specifies a dedicated 5 V, 2.5–3 A Pi supply; verify the power requirements of your exact board and peripherals. |
| USB audio adapter or interface | Provides audio input and output. Input level, noise, driver support and mono/stereo wiring vary. The reference adapter expects a mono 3.5 mm microphone connection; do not assume its wiring applies to other devices. |
| Buffer or instrument-level input | Needed for the reference direct-guitar/low-cost-adapter arrangement; may be unnecessary with a proper instrument input or external buffer. |
| Momentary normally-open footswitch | Play/Record/Stop control in the reference design. Do not substitute a latching switch without changing the control logic. |
| Latching switches | The documented design uses a 3PDT Run/Edit switch and a latching buffer on/off toggle. |
| Jacks, wiring and enclosure | The integrated version uses three 1/4-inch jacks plus internal audio connections. Measure the assembled hardware before choosing an enclosure; plan for footswitch clearance, ventilation, cable strain relief and service access. |
| LEDs and optional seven-segment display | Useful for status. The reference software expects a common-cathode display and particular wiring assumptions. |
| Buffer components | The reference circuit uses a BC549 transistor, 10 µF and 22 µF electrolytic capacitors, a 0.1 µF capacitor, and specified resistors. A BC550 is described as a near-direct alternative by the project author; other transistor substitutions require checking the pinout and circuit, not just the part name. |
The documented integrated build powers the Pi from its dedicated 5 V supply and the buffer from a separate 9 V battery, intended to reduce noise. Treat this as one project’s approach, not a guarantee of hum-free operation. Avoid a fully metal enclosure if you rely on Wi-Fi or Bluetooth inside it; the project notes that wireless signals need a path out.
Rank #2
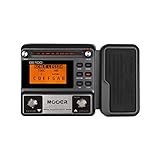
- 80 preset patches and 80 user patches, enough for creating your sound library. You can save any preferred tones by simply pressing down the SAVE button.
- 8 effect modules, including 66 effect types, providing you with the most unique Mooer sound library. Simply rotate the knob above the screen and everyth
- 6 assignable expression pedal parameters which greatly improve the convenience and diversity of controlling the tone. Unique adjustable output mode setting allows you to use line out mode to still get a good tone when playing without an amp.
- By using 180 seconds looper and a drum machine which contains a variety of rhythm patterns, you can create your own music without using a computer.
- GE100 has scale and chord learning function. Just click the LESSION button to enter the scale and chord knowledge reserve interface.
Prototype the audio path before soldering
- Boot the Pi and confirm the chosen OS starts reliably.
- Connect the audio interface and check that the operating system sees the intended input and output devices.
- Feed in a guitar through a suitable instrument input or buffer. Listen for weak, thin, noisy or distorted sound before adding controls.
- Record a short phrase, let it repeat, then overdub. Check stop, clear and undo behavior in the software you selected.
- Test at the buffer settings and sample/buffer configuration you plan to use. Repeat after reboot and during a longer session.
Do not promise yourself “zero latency” based on a product specification from another device. Audio delay depends on the interface, driver/audio stack, buffer size, sample rate, processor load, effects and storage activity. To measure your build, record a sharp transient such as a pick attack with direct and monitored paths captured together, compare their timing in a DAW, and repeat under the complete intended load. Do not publish or rely on a latency figure until it has been measured on that exact setup.
Software installation: an archived project path, not a current guarantee
The Norm’s Projects installation page documents a dedicated-Pi setup and these commands:
sudo apt-get update
sudo apt-get full-upgrade
sudo reboot
After reboot, its page instructs readers to run:
cd ~
wget https://normfrenette.com/looperinstall.sh && sudo bash looperinstall.sh && rm looperinstall*
sudo reboot
The installer is documented as installing GLib, D-Bus, ALSA and Python dependencies, placing program files in a loop directory and creating systemd services for startup. But the project identifies its software as beta, with a June 15, 2022 version date, and its installation page dates to 2022. Treat this as a historical project path that may need adaptation—not as a verified install method for current Raspberry Pi OS.
The command downloads a remote script and runs it with administrator privileges. Before doing that, inspect the script, confirm the URL is still controlled by the project author, and check whether the code supports your OS release. Use a dedicated, freshly imaged Pi rather than one containing important services, and back up the SD card once you have a working setup. The project warns that unrelated programs and file activity can cause audio skips or unacceptable delays; its software page is at Norm’s Projects’ installation guide.
Free tools Windows power users keep installed
One-click scans. No signup required.
Rank #3
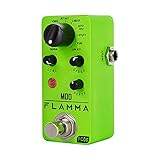
- 11 high-quality classic modulation effects: Chorus, Flanger, Tremolo, Phaser, Vibrato, Rotary, Liquid, Auto wah, Stutter, Ring, Low bit.
- Full metal shell design makes it more durable.
- Tiny size makes it compact and portable.
- Bright color brings energy to your performance.
- 9V 150mA power supply, Not Included.
Controls and operation in the documented design
The reference integrated version has three relevant controls: the momentary Play/Rec/Stop footswitch, a latching Run/Edit switch and a latching buffer toggle. In Run mode, the looper output goes to the output jack, the main footswitch controls looping, and the display indicates the track count. In Edit mode, the guitar is routed directly to the looper output in the documented wiring; the green LED lights and the display flashes. The main switch then serves project-specific deletion, recovery or shutdown functions. “True bypass” describes that particular circuit arrangement, not an automatic feature of every Pi looper.
Before powering up, verify which GPIO numbering convention and pull-up/pull-down logic the program expects. A footswitch can fail because it is the wrong type (momentary versus latching), wired normally closed instead of normally open, connected to the wrong pin, or missing a ground connection. If adding a seven-segment display, check common-cathode versus common-anode type, segment wiring and resistor placement against the code and schematic.
Test the finished pedal before closing the box
- Clean input and output at realistic guitar levels, with no clipping or unexpectedly low volume.
- Record, playback, overdub, stop, clear, and any undo/restore functions you rely on.
- Run/Edit or bypass behavior and buffer on/off behavior, if fitted.
- Cold boot, reboot and shutdown; confirm the audio service starts and controls respond each time.
- Long-duration playback and overdubbing, including the storage activity you expect during use.
- Noise with LEDs and display active. Temporarily disconnect display wiring if it helps isolate a buzz.
- Mechanical checks: footswitch clearance, secure jacks, cable strain relief, ventilation and access to the SD card and USB ports.
Troubleshoot by symptom
Thin or weak guitar tone
The likely issue is a guitar connected directly to an input not designed for instrument impedance. Turn on the reference buffer, add a suitable external buffer/DI, or use an audio interface with an instrument input. An amplifier line or headphone output may also be suitable if levels and connection are appropriate.
Hum or buzz
Check the power supply, grounding, long or unshielded audio wires, and whether digital-control wiring runs close to the input. Try the separately powered buffer used in the reference design, keep audio wiring short and shielded, and temporarily disconnect LEDs or the display to identify coupling. A noisy USB adapter may simply need replacement. The reference author reports that separating buffer and Pi circuitry on a PCB improved noise in that build; this is not a promise that the same change will eliminate noise in another layout.
Rank #4

- Express Yourself - Expand and unlock the full creative scope of your controller or keyboard with M-AUDIO's universal EX-P expression pedal
- Control Anything - Manipulate any MIDI assignable control or parameter in real time, including volume, modulation, panning, filter sweep and more
- Universal Compatibility - Built-in and discretely located polarity switch for compatibility with most keyboards, controllers, synthesisers and effect devices with an expression pedal input
- Robust, Reliable - Secure, robust and hardwired 1/4" 18 m TRS cable fits industry standard expression pedal inputs
- Compact, Lightweight Footprint - Moulded construction provides robust build, portability and performance durability; textured foot-rest for non-slip use and smooth, wide-angled action for precise expressive capability
Skips or stutters
Start with the project’s known cautions: use a dedicated installation, stop unnecessary background services, verify the supply, and check for file operations during playback. Try a larger audio buffer and test another known-compatible interface if needed. A larger buffer may improve stability at the cost of more delay. Do not assume an older project’s Pi recommendation or a newer board’s general audio capability guarantees compatibility.
No output or controls
Check in sequence: Pi boot, USB device detection, selected input/output, guitar signal, buffer power if needed, output jack and amplifier level, Run/Edit position, and whether the looper service is running. For switches, verify the required momentary/latching type, wiring, GPIO assignment and ground. For the display, check type and pin assumptions against the project code.
Independent reader supportYour contribution helps us test, update, and keep practical guides available for everyone.Other DIY routes
Computer or tablet looper with DIY foot controller: The computer handles audio while handmade USB, MIDI or other controls trigger record, overdub, stop and undo. This avoids much of the embedded-audio work but is less self-contained on a pedalboard.
Pi effects platform: PiPedal is a Pi-based guitar-effects processor with remote control and documented support for Pi 4 or Pi 5 with external USB audio devices or internal audio hardware. Its project page lists Raspberry Pi OS Bookworm or Trixie and Ubuntu 24.x or later on supported systems. Verify the exact looping workflow and foot-control mapping you need; an effects host is not automatically a complete looper.
Recommended Free Tools
Best Value

- 10PCS PT2399 PT2399S SOP-16
Broader music workstation: Zynthian is an open hardware platform that includes real-time audio processing, looper, sampler and step-sequencer functions. It may suit a builder seeking a wider instrument workstation, but is likely more complex than a single-purpose pedal.
Custom embedded platform: A dedicated audio DSP or embedded system can make a purpose-built pedal possible, but you must design and validate the audio codec, memory, timing, controls and software. A microcontroller may serve as a control device; do not mistake that for a complete, general-purpose audio path.
DIY or buy?
Build when the project itself is valuable: you want to learn electronics, Linux or audio programming; need an unusual interface; or plan to customize and repair the device. Buying is usually the better decision when you need immediate operation, predictable live behavior, manufacturer support or warranty coverage.
Do not assume DIY is cheaper. The cost depends on your actual basket: Pi, supply, SD card, audio interface, switches, jacks, display, buffer parts, enclosure, wiring, tools, shipping and failed or replacement components. The reference project’s price comparisons date from 2021 and its adapter price is historical, not a current quote. A commercial pedal also bundles mechanical design, audio conversion, firmware, testing and support.
For perspective, manufacturers document capabilities that take substantial work to reproduce: Pigtronix’s Infinity specifies stereo loop pairs and record, playback, overdub, undo/redo and synchronization options. A wider music workstation or purpose-built performance controller may also be worth considering, but its specifications do not describe what a home-built Pi pedal will achieve. For an actual DIY cost comparison, price the complete parts basket available in your region rather than relying on old headline prices.
Verdict
For a learning project, first prove the audio path in software, then build a Pi prototype with an appropriate instrument input, a USB interface, and simple foot controls. Add the reference buffer only if your chosen input arrangement needs it, and treat the 2022 Norm’s Projects code as a version-specific starting point, not guaranteed current software. Keep the system dedicated, measure latency on your own hardware and test it thoroughly before trusting it onstage. If a missed loop would spoil a performance, a supported commercial pedal is the safer choice.
Quick Recap
Product prices and availability are accurate as of the date/time indicated and are subject to change. Any price and availability information displayed on Amazon at the time of purchase will apply.