Crashes, No Sound, or Screen Glitches?
Random freezes, missing sound and display glitches usually trace back to one bad driver. Find and replace yours safely.Free scan · under a minuteWindows Errors? Fix Them Before They Spread
Repair common Windows errors and clear accumulated junk for a smoother, more stable PC - no reinstall needed.Free scan · no reinstallA reliable solo setup for the Blackmagic PYXIS 6K starts with the exact mount version, then matches the lens, recording mode, media, audio path, power and monitoring to the way you will work. Check whether your body is the L-Mount, EF or PL model before buying accessories. Then rehearse the complete chain—lens, cards, settings, microphone, headphones, batteries and support—before filming an interview or spending a day in the field.
The recommendations below use Blackmagic Design’s published specifications rather than independent test results. Product figures such as the 36 mm × 24 mm sensor, 13 stops of dynamic range and dual native ISO 400 and 3200 are manufacturer specifications, not guarantees of a particular scene’s exposure or image quality.
Start by identifying your PYXIS 6K mount
The PYXIS 6K is sold in three mount versions: L-Mount, EF and PL. The mount determines which lenses fit directly and which autofocus information applies. Read the label on the camera body and inspect the mount before choosing a lens, adapter or follow-focus arrangement.
| Camera version | Direct lens ecosystem | Autofocus information published for this setup | Important limitation |
|---|---|---|---|
| L-Mount | Compatible L-Mount lenses | Blackmagic lists single-shot, continuous, object-tracking and face-tracking autofocus with compatible L-Mount lenses. | Blackmagic states that “Autofocus performance may vary when using lens mount adapters.” |
| EF | EF lenses | Do not transfer the L-Mount autofocus list to this version; the published information cited here does not establish equivalent modes for EF. | Check the current model documentation and the individual lens or adapter requirements. |
| PL | PL lenses | Do not assume the L-Mount autofocus modes apply to PL lenses. | Plan for the focus method and accessories your PL lens requires. |
For a one-person documentary, choose optics around the working distance, subject movement and framing you actually expect. A seated interview, a walk-and-talk and a crowded observational scene place different demands on focal length, minimum focus distance, stabilization and operator access. There is no universally best focal length established by the published specifications. If you use an adapter, test the exact lens-and-adapter combination rather than assuming that the L-Mount body’s listed autofocus behavior will carry over unchanged.
#1 Best Overall

- For photographers and videographers who need a high-speed performance memory card
- Up to 1750MB/s read and 1300MB/s write
- Shoot more high-quality images and 8K video
- Backwards-compatible with select XQD cameras
- Limited 10-year warranty
Before the shoot, confirm that the lens locks securely, that the camera recognizes the lens where applicable, and that focus and iris controls behave as expected. If you intend to rely on face or object tracking, verify that the selected lens supports the relevant function and decide what you will do when the subject leaves the tracking area. A solo operator should be able to switch to a manual focus or focus-assist routine without dismantling the rig.
Use the Blackmagic PYXIS technical specifications for the current mount and feature list, and consult the Blackmagic PYXIS 6K Installation and Operation Manual for model-specific operating details.
Choose a recording mode before you buy or format media
Set the delivery frame rate and aspect ratio first. A documentary intended for a standard 16:9 master does not automatically benefit from recording every shot in the largest available raster, while an edit that needs reframing may justify an open-gate or wider capture mode. Your choice also affects card capacity, transfer time, storage and the computer’s ability to play or transcode the files.
| Resolution and framing | Maximum listed frame rate | When it may fit a solo documentary workflow |
|---|---|---|
| 6048 × 4032 open gate | Up to 36 fps | Useful when you need the full sensor area for reframing or alternate delivery crops, provided your media and post-production storage can sustain it. |
| 6048 × 3408, 6K 16:9 | Up to 46 fps | A 16:9-oriented 6K option when you want extra resolution without the open-gate frame. |
| 6048 × 3200, 6K DCI | Up to 48 fps | Suitable for a DCI-shaped project or a workflow that deliberately uses that frame geometry. |
| 6048 × 2520, 6K 2.4:1 | Up to 60 fps | For a wide 2.4:1 presentation or a planned crop that preserves that shape. |
| 4096 × 2304, 4K 16:9 | Up to 60 fps | A lower-resolution 16:9 choice that can reduce storage and processing demands compared with 6K. |
| 1920 × 1080 | Up to 120 fps | Useful when HD delivery or high-frame-rate capture is the actual requirement. |
Blackmagic explicitly notes that the maximum sensor frame rate depends on the resolution and codec selected. Treat the frame-rate figures above as the published maxima for those modes, not as a promise that every codec combination reaches the same rate. Decide whether you need normal-speed, slow-motion or a mixture, and keep the project’s base frame rate consistent with your editor and delivery specification.
What’s actually slowing this PC down?
Pick the symptom - the matching free tool is one click away.
Plan the two CFexpress slots conservatively
The L-Mount specifications list dual CFexpress slots. The published product page does not identify a particular card model, minimum sustained write speed or an exact compatibility list. Do not buy a card solely because its peak laboratory speed looks high, and do not infer a required speed from the frame-rate table. Check the current manual and the camera’s supported-media guidance before purchase.
Estimate capacity from the mode, codec, planned shooting ratio and the number of interviews or locations. Carry more formatted capacity than the mathematical minimum, and decide whether the two slots will be used for sequential recording, overflow or another supported destination. The correct choice depends on the camera’s current menu options and your backup policy, so confirm it on the actual body before the shoot.
After inserting the cards, format them in-camera using the camera’s current menu, verify the selected destination and record a short clip. Play the clip back and copy it to the computer or backup drive you will use on location. This confirms not only that recording starts, but also that your ingest process can read the resulting file.
Rank #2

- Read speeds of up to 1700MB/s and 1400MB/s write speeds** offer low latency during high-speed recording and enhance workflow efficiency far beyond existing SanDisk cards [512GB only; 128GB-256GB = 1700MB/s read / 1200 MB/s write; 64GB = 1500 MB/s read / 800MB/s write] | **Up to 1700MB/s read speed; up to 1400MB/s write speed. Based on internal testing; performance may be lower depending upon host device, usage conditions, and other factors. 1MB=1,000,000 bytes.
- Enables smooth, RAW 4K video(1) | (1)4K video (4069x2160p) support may vary based on host device, file attributes, usage conditions and other factors.
- The Cfexpress CardType B is backwards-compatible with select XQD cameras that adopt firmware enabling Cfexpress(2) | (2)Backwards compatibility with select XQD cameras subject to the availability and installation of a camera firmware update provided by the camera manufacturer enabling CFexpress compatibility.
- RescuePRO Deluxe Recovery Software included(3) (download required) | (3)Registration required; terms and conditions apply
Configure focus and exposure aids for solo operation
A one-person crew cannot watch the subject, pull focus, judge exposure and monitor audio from separate positions. Build a repeatable on-screen routine using the controls Blackmagic lists: focus zoom, focus assist, false color, zebra, frame guides, ISO, shutter, iris, white balance, tint and record start/stop.
Recommended Free Tools
Make focus decisions before the interview starts
- Set the framing and camera distance while the subject is in the position where the interview will occur.
- Use focus zoom and focus assist to confirm critical detail at the intended focus distance.
- If your L-Mount lens supports the listed autofocus modes, select the mode that matches the subject’s movement and test it briefly. For an adapter combination, treat the result as unverified until you have tried that exact pairing.
- For a static seated subject, consider whether a deliberate manual focus position is more predictable than continuous tracking. Mark the position or note the focus distance so you can restore it after a battery or lens change.
- For moving coverage, decide how you will recover if tracking loses the subject: a focus-assist shortcut, a known manual distance or a second operator is not available, so the recovery must be yours.
Build an exposure routine instead of copying a “best” setting
Use false color and zebra to inspect faces, bright windows and reflective surfaces while watching the actual location. Set ISO, shutter, iris, white balance and tint deliberately for the scene and the delivery frame rate. The specifications list these controls but do not establish universal values for changing documentary locations. A bright exterior, a dim interview room and a mixed-light hallway may require different choices.
Frame guides can protect the intended crop when you record open gate or another non-delivery aspect ratio. Recheck guides after changing resolution or framing. Keep the record start/stop control accessible from your operating position, especially if the camera is on a shoulder, tripod or compact handheld support.
Build the audio path before attaching the camera to the rig
Documentary pictures are often salvageable when a shot is slightly imperfect; unintelligible speech is not. Choose the input that matches the microphone or wireless receiver, set the level type correctly and monitor the result through headphones.
Use mini-XLR when your source needs balanced camera input
The L-Mount specifications list one mini-XLR analog input that can be switched between microphone with phantom power and line level. Use a microphone or receiver with the correct mini-XLR connection, or an appropriate cable or adapter. Confirm whether the source expects microphone level, line level or phantom power before enabling anything. Sending a line-level output into a microphone setting, or applying phantom power to equipment that does not accept it, can produce distortion or risk incompatibility.
Free tools Windows power users keep installed
One-click scans. No signup required.
Use the 3.5 mm input for compatible stereo sources
The same specifications list one 3.5 mm stereo input. Match the plug wiring and output level of the microphone, recorder or wireless receiver to that input. A generic cable is not automatically correct: verify connector type, whether the source is mono or stereo, and whether its output level is intended for a camera input.
Monitor every rehearsal
- Connect the microphone or receiver and select the corresponding input.
- Set mic or line mode and phantom power only as required by that source.
- Ask the subject to speak at the expected level and watch the camera meters for a stable, healthy signal rather than relying on a silent-room check.
- Listen through the headphone output for clothing rub, cable handling, radio interference, hum, distortion and a left/right routing problem.
- Record a short clip, stop, play it back and listen again. A meter can look normal while a connector is intermittent or a cable is touching the microphone.
Make the sound check with the camera, lens, monitor, wireless receiver and power accessories configured as they will be on location. Changing the rig after the check can introduce cable strain, electrical noise or a different operating position.
Rank #3

- For photographers and videographers who need a high-speed performance memory card
- Up to 1750MB/s read and 1300MB/s write
- Shoot more high-quality images and 8K video
- Backwards-compatible with select XQD cameras
- Limited 10-year warranty
Plan power without promising an unsupported runtime
Blackmagic lists BP-U series batteries for the relevant PYXIS versions. The published specifications do not give a dependable runtime for a particular battery capacity, lens, monitor, wireless receiver or complete rig. Treat any runtime estimate you find elsewhere as configuration-specific unless it documents the same camera, accessories and recording conditions.
Carry enough confirmed-compatible BP-U batteries for the planned day, plus a reserve for delays, cold conditions, extra takes and setup time. Label charged and depleted batteries, protect spare contacts and rehearse a battery change without disturbing the lens, microphone cable or support. If an external monitor or wireless receiver draws from its own battery, include that device in the power plan rather than counting only camera batteries.
The Tool Desk
Outbyte PC Repair FREEClear out junk files and repair common Windows errorsFree Scan →Outbyte Driver Updater FREEFix the driver behind crashes, sound loss and screen glitchesFind Drivers →The practical requirement is a verified day plan: power the complete rig, record at the intended settings, monitor audio and perform several starts and stops. Note how much capacity the rehearsal consumes, but do not turn that single rehearsal into a guaranteed runtime for every location.
Choose the monitoring and support arrangement
Use the built-in display when its position works
The camera’s integrated display is specified as a 4-inch, 1920 × 1080 touchscreen with a stated brightness of 1500 nits. Use the touchscreen controls and the on-screen focus, exposure and audio information from the position where you will actually operate. Check reflections and viewing angle at the location; a bright specification does not remove the need to place the screen where you can see it.
Consider the optional PYXIS Monitor Kit for a different viewing position
Blackmagic lists the PYXIS Monitor Kit as a compatible optional accessory. Its product description includes camera-control functions, mounting hardware and a sunshade. It can make sense when the camera position and your operating position are separated or when the built-in display cannot be placed at a useful angle. Verify current regional availability, price and the exact contents of the kit before ordering.
Keep the rig as simple as the shot allows
The body provides bottom and side mounting points, including 1/4-20 positions with ARRI locating-pin patterns and M4 points. Use the points needed for your support, monitor or cable management rather than filling every position. For a seated interview, stable support and accessible headphone monitoring may matter more than a large accessory cage. For handheld or moving work, evaluate total weight, cable security, screen placement and whether your thumb can reach record and monitoring controls.
A tripod or other stable support is a task-enabling choice, not a mandatory PYXIS component. Select one that safely carries the camera, lens, monitor and audio accessories you will actually use. Secure cables so that turning the camera or changing batteries does not pull on a mini-XLR or 3.5 mm connector.
Rank #4
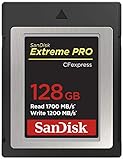
- Read speeds of up to 1700MB/s and 1400MB/s write speeds offer low latency during high-speed recording and enhance workflow efficiency far beyond existing SanDisk cards [512GB only; 128GB-256GB = 1700MB/s read / 1200 MB/s write; 64GB = 1500 MB/s read / 800MB/s write]. Up to 1700MB/s read speed; up to 1400MB/s write speed. Based on internal testing; performance may be lower depending upon host device, usage conditions, and other factors. 1MB=1,000,000 bytes.
- Enables smooth, RAW 4K video(1). (1) 4K video (4069x2160p) support may vary based on host device, file attributes, usage conditions and other factors.
- The Cfexpress CardType B is backwards-compatible with select XQD cameras that adopt firmware enabling Cfexpress(2) | (2)Backwards compatibility with select XQD cameras subject to the availability and installation of a camera firmware update provided by the camera manufacturer enabling CFexpress compatibility.
- RescuePRO Deluxe Recovery Software included(3) (download required) | (3)Registration required; terms and conditions apply
Follow this pre-shoot setup sequence
- Confirm the body and mount. Read the camera label, identify L-Mount, EF or PL, and fit only the intended lens or a verified adapter combination.
- Set the project format. Choose delivery frame rate, aspect ratio, resolution and codec before formatting cards. Record open gate or a wider mode only when the extra image area serves the edit.
- Prepare media. Insert the supported CFexpress cards for your model, format them in-camera, select the destination and confirm remaining capacity. Use the current manual to verify card requirements.
- Build the lens and focus routine. Check iris and focus operation, select autofocus or manual focus deliberately, and verify focus with zoom or focus assist.
- Set exposure aids. Turn on the frame guides, false color or zebra tools you can interpret quickly, then set ISO, shutter, iris, white balance and tint for the scene.
- Connect audio. Choose mini-XLR or 3.5 mm, set mic or line level, apply phantom power only when required, and connect headphones.
- Configure monitoring. Position the built-in display or optional monitor so you can see framing, focus, exposure and meters without leaving the operating position.
- Install power and support. Fit a confirmed BP-U battery, mount the camera securely, route cables with slack for movement and keep a charged spare accessible.
- Record and ingest a test. Start a short clip, speak at interview level, stop, play it back through headphones and copy the file to the intended editing or backup storage.
- Reset for the first take. Clear the test clip if appropriate, confirm the selected card and destination, check remaining battery and media, and verify that record start/stop responds from your normal operating position.
Run a complete rehearsal, not just a power-on check
Rehearse with the actual lens, cards, microphone or receiver, headphones, monitor, cables, support and batteries. Walk through a realistic interview: place the subject, frame them, set focus and exposure, start recording, ask several questions, stop, review the clip and perform the file copy. Then repeat the exercise after a battery change or a card change. This exposes the small failures that a menu check misses, such as a cable that becomes tight when the camera tilts, a monitor that blocks a control or a card destination that was not the one you expected.
- Confirm the body mount and lens lock.
- Verify the selected resolution, frame rate, codec and aspect-ratio guides.
- Check both card slots or the selected recording destination and available capacity.
- Confirm focus mode, focus-assist visibility and a recovery method if tracking loses the subject.
- Check ISO, shutter, iris, white balance and tint under the actual location light.
- Watch audio meters while the subject speaks and listen for noise through headphones.
- Test record start/stop from the position you will use during the take.
- Play back the file and complete one real ingest or backup.
- Verify battery charge and the location of spare BP-U batteries.
- Check that the display or monitor remains visible in the expected light and that every cable is strain-relieved.
Troubleshoot by symptom before the shoot
| Symptom | Likely check | Corrective action |
|---|---|---|
| The lens will not autofocus as expected | Mount version, lens compatibility and adapter use | Confirm that the body is the L-Mount model and that the lens supports the selected mode. If an adapter is involved, test manual focus or another verified combination; Blackmagic warns that adapter use may affect autofocus performance. |
| Recording will not start or stops unexpectedly | Card support, formatting, destination, mode and available capacity | Recheck the current manual’s media guidance, format the card in-camera, confirm the selected slot and choose a mode your cards and storage can sustain. |
| Audio meters are silent | Input selection, connector, mic/line setting and phantom-power requirement | Check whether the source is connected to mini-XLR or 3.5 mm as intended, set the matching level and apply phantom power only if the microphone requires it. Listen through headphones and make another test recording. |
| Audio is distorted | Source output level and camera input mode | Do not feed a line-level source into a microphone setting or overload the input. Reduce the source level or select the correct line setting, then record and review another clip. |
| The image is soft during a moving shot | Tracking reliability, focus distance and monitoring position | Use focus zoom and focus assist, test the selected autofocus mode with the actual lens, or choose a repeatable manual-focus distance and keep the subject within it. |
| The screen is difficult to use on location | Angle, reflections, sunlight and accessory placement | Reposition the camera, simplify the rig or consider the optional PYXIS Monitor Kit with its listed mounting and sunshade features. Verify kit contents and availability for your region. |
| The camera or accessories lose power early | Battery condition and total accessory draw | Use confirmed-compatible BP-U batteries, carry a reserve and rehearse the complete rig. Do not rely on a runtime figure that does not match your battery, lens, monitor and receiver combination. |
Know what the published specifications do—and do not—tell you
Blackmagic’s current technical specifications list a 36 mm × 24 mm full-frame sensor, 13 stops of dynamic range and dual native ISO 400 and 3200. They also list the 4-inch 1920 × 1080, 1500-nit display and the 6048 × 4032 open-gate mode at up to 36 fps. These are manufacturer-stated product specifications. They are useful for planning a lens, framing and workflow, but they are not independent measurements and do not guarantee a particular result in low light, high contrast or mixed illumination.
The specifications also state, “Maximum sensor frame rate dependent on resolution and codec selected.” Keep that qualification attached whenever you compare modes. Similarly, treat the autofocus list as applying to compatible L-Mount lenses on the L-Mount body, not as a general promise for EF or PL versions.
Do these 3 things before closing this tab:
1Clear out junk files and repair common Windows errors2Scan for outdated or missing drivers - takes under a minute3Repair Windows errors before they cause bigger problemsFor editing, plan storage and backup around the mode you actually select. DaVinci Resolve is a workflow option for editing and finishing, and Blackmagic Cloud is an available collaboration product, but neither changes the camera’s media requirements. Your usable workflow is the combination of camera mode, supported card, transfer method, storage capacity and computer performance.
What to confirm from the current manual
Before buying cards or finalizing a menu checklist, open the current PYXIS 6K Installation and Operation Manual. Use it to verify exact CFexpress requirements, supported recording combinations, slot behavior, menu names and any firmware-dependent differences for your mount version. The technical-specifications page is the starting point for the published capabilities; the manual is the authority for the detailed operating procedure on the body you own.
A solo documentary setup is ready when every critical action has a known place in your routine: the lens fits the body, the recording mode fits the cards and edit, the microphone reaches the correct input at the correct level, the monitor is visible, the battery plan covers the day with reserve, and a recorded file has been played back and ingested successfully. That rehearsal is more valuable than adding another accessory at the last minute.
Quick Recap
Product prices and availability are accurate as of the date/time indicated and are subject to change. Any price and availability information displayed on Amazon at the time of purchase will apply.






Say something about this film